Contents
Introduction
This is a relatively simple project that most people should be able to cope with. It is a good project for the novice woodworker and novice gardener.
This particular veggie box or station is a 3ft x 6ft (900mm x 1800mm) rectangle that is 6″ (150mm) high, but you can make it any size you want by adhering to the same principles used to make this particular sized box.
Measurements
The measurements in this documentation are given in both Imperial (inches) and Metric (mm).
The Imperial measurements are given first followed by the Metric measurements in brackets ( ).
For example: 1″ x 6″ (25mm x 150mm).
What you will need
- The sides and ends (treated or rot resistant wood)
- 2 pieces of 1″ x 6″ (25mm x 150mm) that is 6ft (1800mm) long.
- 2 pieces of 1″ x 6″ (25mm x 150mm) that is 3ft (900mm) long.
- Stakes (treated or rot resistant wood)
- 6 stakes 2″ x 2″ (50mm x 50mm) about 16″ (400mm) long.
- Note: Stakes are pointed pieces of wood used to hammer into the ground.
- You can make your own from 2″ x 2″ (50mm x 50mm) stock. Alternatively, some garden centers sell stakes.
- Plastic or polythene
- About 1ft (300mm) by 20ft (6m) to go around the inside edge of the box to keep any poisons from the treated wood (if applicable) getting into the soil.
- Cut-up plastic rubbish bags is an ideal source for the plastic, maybe even the bags that the soil came in.
- Potting mix, garden soil or similar
- 9 cubic ft (240 litres)
- The soil can generally be purchased in handy plastic bags of varying sizes.
- Nails
- Around thirty-two 2″ (50mm) galvanized nails.
Making and fixing the box in place
Step 1. Make the box
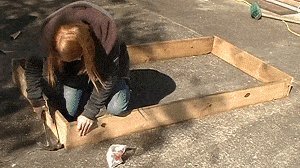
- Lay the two sides on even ground spread apart 3ft (900mm).
- Nail the two end pieces (one each end) to the sides.
- Use 2″ (50mm) galvanized nails. Three at each corner.
Step 2. Position the box and stake it
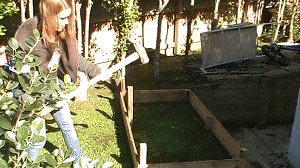
- Pick up the box frame and position it where you want your garden to be.
Place six stakes around the inside of the frame, one at each corner and one in the center along each side. - Hammer them into the ground as far as possible – ideally so that the top of each stake is flush with the top of the frame.
Step 3. Trim the stakes
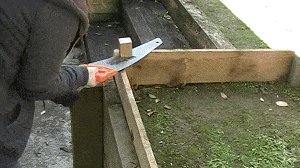
- Sometimes (because of ground conditions) it may not be possible to hammer the stakes all the way in so they’re flush with the top of the frame. Maybe parts of the ground are too hard.
- In that case, once the stake is hammered in, if the top finishes above the top of the frame, then trim it off with a handsaw to make it flush.
Step 4. Clamp and fix the stakes
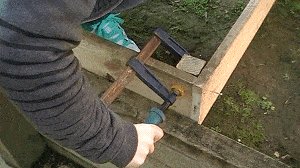
- Clamp the stakes to the side of the frame to eliminate the ‘spring/bounce effect’ while you nail.
- Nail through the frame into the stakes.
- Use 2″ (50mm) galvanized nails, four at each corner and two for each center stake.
Preparing the box and adding the soil
Step 5. Cover the inner box with plastic
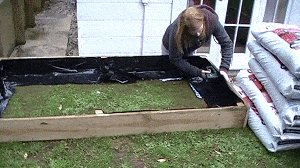
- If you are using treated wood, staple plastic film to the inside of the frame.
The plastic will stop the poisons from the frame seeping into the soil. - A good source of plastic film is from plastic rubbish bags or maybe even from the bags that you buy the soil in.
Step 6. Fill the box with garden soil
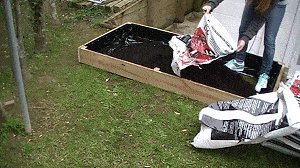
- Fill the veggie/herb box with potting mix, garden soil or similar
- The box will take approximately 9 cubic ft (240 litres) of soil.
- The soil can generally be purchased in handy plastic bags of varying sizes.
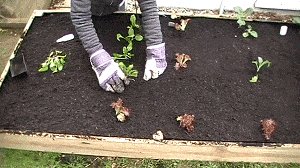
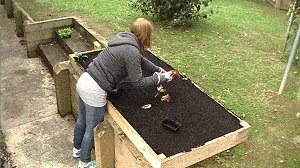
Step 7. Begin planting
- Start planting.
Need some garden advice?
Garden centers in your own locality are always good places to seek planting advice as they are familiar with local conditions.
A while later
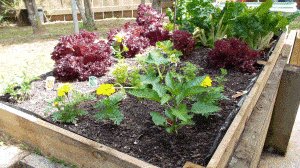
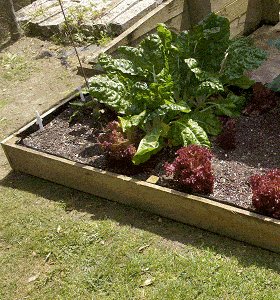
There you are.
Nothing like fresh home-grown vegetables or herbs.

