Contents
Introduction | Measurements used | Description
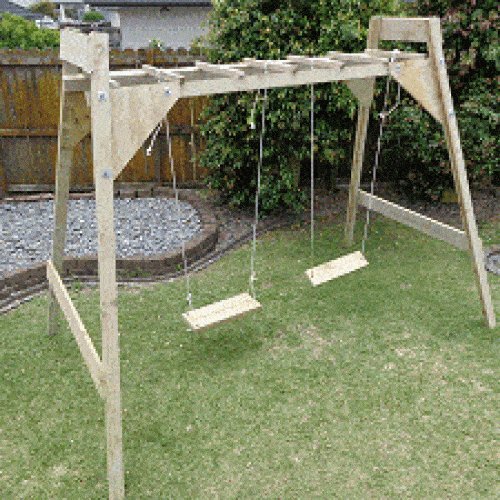
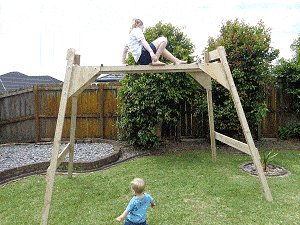
How to build a multipurpose frame that can be used as a brachiation ladder (monkey bars),
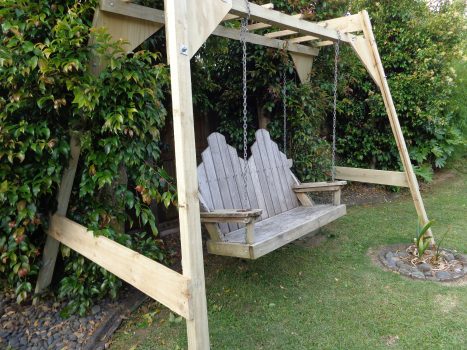
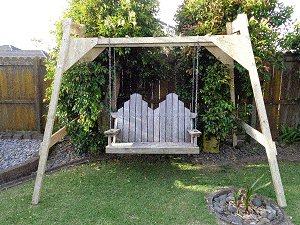
a swing frame, and as it turned out – even a frame to hold a bench swing.
This was another project instigated by my grandkids. They wanted something where they could climb and swing.
Measurements used
This project is written in both standard (inch) and metric (mm).
The standard measurements are given first followed by the metric measurements in brackets.
For example: 2×3 (75mm x 50mm)
Also note, the standard (inch) measurements are not an
exact match to their equivalent metric (mm) counterparts for rounding off purposes – so use one or the other and don’t mix.
Safety note: Kids (and adults) can be very boisterous at times. This is a relatively lightweight structure.
A couple of kids swinging high in unison could possibly tip the unit.
Description
This is a relatively lightweight structure and inexpensive to build. The frame is constructed out of 2×3 (75mm x 50mm) wood.
That stock size is not too common in North America. If you cannot source that size wood, another option is to rip (cut length wise)
2×6 (150mm x 50mm) stock in half, or even upgrade to 2×4 (100mm x 50mm).
The unit stands 85 5/8″ (2140mm) high to the top of the bars, it is 125″ (3125mm) long,
and 72 3/4″ (1820mm) wide.
Materials list
You will need:
Wood
1) 1-1/2″ x 1-1/2″ (38mm x 38mm) wood: 4.4m (14 1/2ft) of. If you cannot source that size, then near enough will do.
Note: You will need to round the corners of the bars with sandpaper, planer, or other, in order to make them easier
on the hands of kids that grip and swing from them.
2) 2×3 (75mm x 50mm) wood: 6 pieces @ 8ft (2.4m) long. You can upgrade to 2×4 (100mm x 50mm) if you cant obtain the former.
3) 1×6 (150mm x 25mm) wood: 16ft (4.8m) of, allowing for a bit of waste.
4) 5/8″ (15mm) thick plywood: one piece 4ft x 4ft (1200mm x 1200mm) which is half a standard sheet.
- Pay online by credit card, debit card, or Paypal using Secure Server Paypal. You do not need a Paypal account if paying by credit or …
Bolts
5) 5/16″ (8mm) galvanized coach (carriage) bolts with nuts and washers: 14 @ 5″ (125mm) long.
6) 3/8″ (10mm) galvanized coach (carriage) bolts with nuts and washers: 8 @ 3″ (75mm) long, and 4
@ 5″ (125mm) long.
Ensure the lumber is of a high quality, knot free, and suitable for exterior use.
Plans – side view
a: beam, 2×3 (75mm x 50mm) wood – You can upgrade to 2×4 (100mm x 50mm) if you cant obtain the former.
b: bar, 1-1/2″ x 1-1/2″ (38mm x 38mm) wood – or similar size.
Note: You will need to round the corners of the bars with sandpaper, planer, or other, in order to make them easier
on the hands of kids that grip and swing from them.
c: leg, 2×3 (75mm x 50mm) wood – You can upgrade to 2×4 (100mm x 50mm) if you cant obtain the former.
d: top end rail, 1×6 (150mm x 25mm) wood.
e: bottom end rail, 1×6 (150mm x 25mm) wood.
f: plywood brace, 5/8″ (15mm) thick plywood.
Plans – front view

a: beam, 2×3 (75mm x 50mm) wood – You can upgrade to 2×4 (100mm x 50mm) if you cant obtain the former.
b: bar, 1-1/2″ x 1-1/2″ (38mm x 38mm) wood – or similar size.
Note: You will need to round the corners of the bars with sandpaper, planer, or other, in order to make them easier
on the hands of kids that grip and swing from them.
c: leg, 2×3 (75mm x 50mm) wood – You can upgrade to 2×4 (100mm x 50mm) if you cant obtain the former.
d: top end rail, 1×6 (150mm x 25mm) wood.
e: bottom end rail, 1×6 (150mm x 25mm) wood.
f: plywood brace, 5/8″ (15mm) thick plywood.
Step 1. Cutting the pieces
The top bars
- Cut the top bars out of 1-1/2″ x 1-1/2″ (38mm x 38mm) wood. If you cannot source that size, then near enough will do.
- In all you will need about 4.4m (14 1/2ft) allowing for a bit of waste.
- Cut 7 pieces [b] to the lengths as given in the drawing below. Also angle each end as shown in the drawing below.
Note: You will need to round the corners of the bars with sandpaper, planer, or other, in order to make them easier on the hands of kids that grip and swing from them.
The legs and beams
- Cut the legs and beams out of 2×3 (75mm x 50mm) wood. You can upgrade to 2×4 (100mm x 50mm) if you cant obtain the former, or you want to make the structure
more substantial. - In all you will need 6 pieces [a] & [c] @ 8ft (2.4m) long.
The end rails
- Cut the end rails out of 1×6 (150mm x 25mm) wood.
- In all you will need about 16ft (4.8m) allowing for a bit of waste.
- Cut two top end rails [d] 26″ (650mm) long, angled back 15 degrees off square at each end.
- Cut two bottom end rails [e] 60″ (1500mm) long, angled back 15 degrees off square at each end.
- Refer to the plan drawing below.
The plywood braces
- Half a standard size sheet of 5/8″ (15mm) thick plywood will do the trick to cut all the pieces.
- A standard size sheet is 4ft x 8ft (1200mm x 2400mm). So half of that is a square
2ft x 2ft (1200mm x 1200mm). - Cut four pieces [f] to the dimensions given in the plan drawing below.
Step 2. Making the ladder (beams and bars)
The brachiation ladder (monkey bars).
That is the top part consisting of 2 parallel beams [a] with 7 bars at right angles spaced evenly along the beams. Like a ladder.
2.1. Mark where the bars go. Temporary nail or clamp together the two beams [a] and place them on a couple of saw stools for marking the bar [b] positions.
- The two end bars begin 4 3/4″ (120mm) in from each end and the other five (the intermediate bars) are evenly spaced.
2.2. Once marked, space the two beams [a] apart 18 3/8″ (460mm) and drill and bolt the bars [b] to the beams [a] on the marks.
- Use galvanized 5/16″ (8mm) galvanized coach (carriage) bolts with nuts and washers approximately 5″ (125mm) long. Use one bolt at each meeting.
- Because the underneath of the bars [b] angle up 15 degrees at each end, the beams will also angle (off plumb) 15 degrees.
Step 3. Fixing the braces to the beams
Drill three 1/2″ (12mm) bolt holes in each plywood brace in the positions shown in the drawing below.
- While the brachiation ladder (monkey bars) are still sitting on saw stools, fix the plywood braces to the ends of the beams as shown in the drawing.
- Fasten each plywood brace in place with a couple of screws.
- Drill through the holes in the plywood braces, and all the way through the beam.
- Thread a 3/8″ (10mm) bolt through the innermost hole of each plywood brace, add a washer and nut, and tighten.
Step 4. Making the side frames
- Each side frame consists of two 2×3 (75mm x 50mm) legs [c], and two 1×6 (150mm x 25mm) end rails [d, e].
- Make them up as shown in the plan on the Plans side view page. Fix the end rails [d, e] to the legs [c] with glue and 3″ (75mm) galvanized flathead nails.
Step 5. Joining the side frames and beams
- Lean the brachiation ladder and one side frame against each other.
- Positioned the brachiation ladder correctly in the side frame and clamp it in place.
See fig.1.
- Ensure the ladder is a neat fit between the side frame and also the same distance down from the top, on both sides.
- You can then drill through the existing holes in the plywood brace into and through the side frame
legs [c]. - Thread bolts through the holes, add washers and nuts, tighten them up, and there’s one side done.
- Temporary prop the other end up.
See fig.2.
- Positioned the other side fame correctly over the brachiation ladder and clamp it in place.
See fig.3.
- Ensure the ladder is a neat fit between the side frame and also the same distance down from the top, on both sides.
- You can then drill through the existing holes in the plywood brace into and through the side frame
legs [c]. - Thread bolts through the holes, add washers and nuts, tighten them up, and that’s the other side done.
That’s about it!
A multipurpose thingy.

