Introduction and Sectional Plan Drawing
When building a low retaining wall in the garden or backyard for whatever reason (maybe just to level the section a bit), including some steps into the design can make the project both practical and aesthetically pleasing. As with any home improvement project putting a bit of thought into a design can make all the difference.
These retaining wall steps are made up of a series of 100mm x 100mm (4″ x 4″) posts laid horizontally on firmly shaped ground.
The steps are easy to make and give a nice solid look which becomes any garden.
This article tells how to incorporate some wide lumber steps into a low retaining wall.
This article does not delve into retaining wall structure since the structure of a retaining wall is governed by a number of factors, such as: height, ground type (soft, hard, etc), ground slope (towards the retaining wall or away from the retaining wall), load (whether there is going to be any vehicle traffic in close proximity to the retaining wall or whether the wall is just going to be supporting the ground), and whether some type of drainage system needs to be put in place.
Some walls require a specific design and approval from the local authority.
In this particular case the retaining wall is a low one, the ground to be retained is firm and slopes away from the wall, and there is no vehicle or similar type load to worry about, so the wall is pretty basic and straight forward.
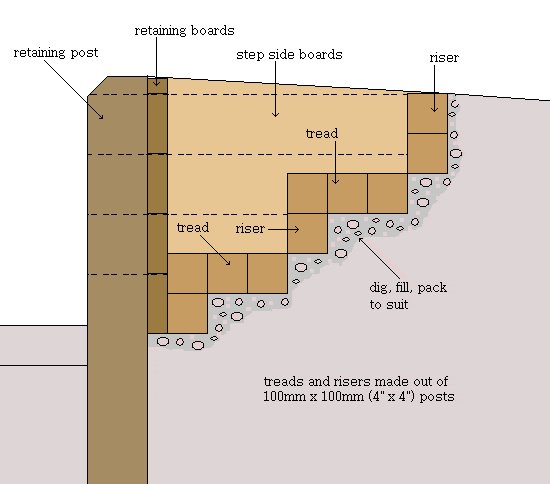
Below is a cross-section plan drawing of the retaining steps. This is followed by instructions and photos on successive pages.
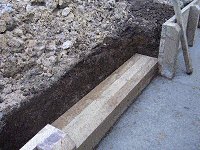
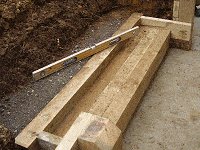
The first step riser and tread
1) Determine an area for the steps
- When designing the retaining wall, leave out a section for the step area.
- The width of the opening for the steps can be any size up to 2400mm (8ft).
- Cut the posts which make up the steps about 200mm (8″) longer than the opening.
- Lay the first post (riser) in place behind the retaining wall.
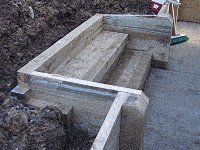
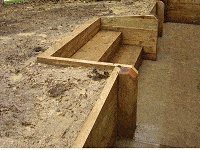
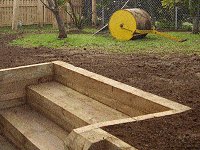
Note: The steps are made out of 100mm x 100mm (4″ x 4″) treated posts laid horizontally on firmly shaped ground. The post below the front of each step is called a ‘riser’ and the three posts joined together horizontally at each step is called the ‘tread’ (i.e. the part you put your foot on).
2) Prepare the ground for the first tread
- Dig back at least 200mm (8″) behind the first riser so that the ground is level with the top of it.
- Dig, pack, and/or fill and tamp until the ground behind the riser is level and firm.
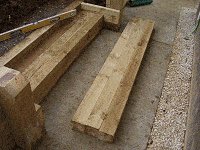
3) Make the first tread
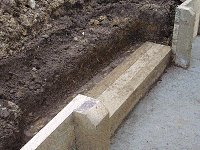
- On a flat even surface make up the first tread by nailing three posts together (angle nail through one into another). Then place the tread on top of the riser and the level ground behind it.
- Nail the tread to the riser. Angle the nails (toe nail) through the front face of the tread into the riser.
The second step riser and the sides
4) Prepare the ground behind the tread
- Dig back at least 100mm (4″) behind the tread.
- Dig, pack, and/or fill and tamp
5) Position the next riser
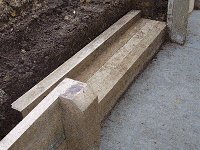
- Place the next riser on top of the firm and level ground directly behind the tread.
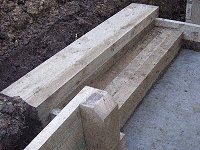
6) Cut and fit the side boards
- Cut the side boards out of 150mm x 50mm (2″ x 6″) treated lumber.
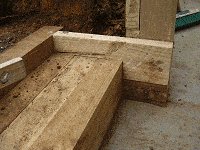
- Measure, mark and cut the first board on each side so that the top of each board is level with the top of the uppermost riser.
- Then cut the ends of the side boards flush with the retaining wall post as shown in the picture.
- Next measure, mark and cut another piece of 150mm x 50mm (2″ x 6″) treated lumber to fill the gap between the bottom of the previously fitted side board and the ground.
The second step tread and top riser
7) Prepare the second step
- Next do a repeat of 2). That is, dig back at least 200mm (8″) behind the top riser.
- Dig, pack, and/or fill and tamp until the ground behind the riser is level and firm.
8) Make up the second tread
- On an even surface make up the next tread by nailing three posts together (angle nail through one into another).
9) Fit the second tread
- Then place the tread on top of the riser and the level ground behind it.
- Nail the tread to the riser. Angle the nails (toe nail) through the front face of the tread into the riser.
10) Make and fit the top riser
- Dig back at least 100mm (4″) behind the top tread. Dig, pack, and/or fill and tamp until that the ground is firm and level with the top of the tread.
- Nail two 100mm x 100mm (4″ x 4″) posts together to make the final riser and then place it on top of the firm and level ground directly behind the tread.
The sides and the back-fill
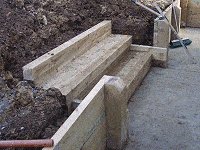
11) Complete the sides of the steps
- Finish the sides in the same manner as explained in 6).
- Trim the ends of the top riser to finish flush with the side boards.
Note: If you require a different finish height, then either add or subtract the amount of risers and treads to suit.
12) Back-fill the steps
- Back-fill around the steps, leaving enough room for some top soil or other preferred finish.
13) Add top soil and grass seed
- Top up with top soil (if that is your preferred finish), throw in some grass seeds and that’s about it.

