Introduction, positioning and post holes
Introduction.
In this project the measurements are given in both metric (mm) and imperial (inches). The metric dimensions are written first followed by the imperial dimensions in brackets.
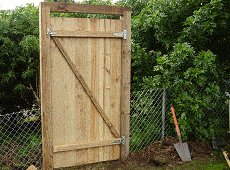
This project is a very basic 1800mm (6ft) high fence gate. It is an easy weekend project which can be made in a few hours but should be spread over two days as the concrete for the posts has to harden before the gate can be fitted.
I used the following lumber for this project:
- 100mm x100m (4×4) treated wood for the posts and header,
- 150mm x 25mm (1×6) treated wood for the vertical gate boards and
- 75mm x 50mm (2×3) treated wood for the gate rails (horizontal pieces) and brace.
- However, please note that the rails and braces can be pretty much anything such as 100mm x 50mm or 100mm x 25mm (2×4 or 1×4).
The purpose of this gate was to create access through a pipe and mesh fence. Although the mesh fence was only 900mm (36″) high, I made the gate 1800mm (72″) high in case I decided to increase the height of the fence at a later time.
This is how I made the basic fence gate.
Positioning.
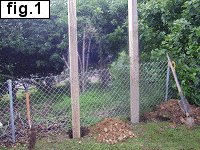
- First I determined where I wanted the gate and how wide it should be. I decided on 900mm (3ft) for the gate width, which meant that the posts should be spaced apart the width of the gate plus 10mm (3/8″) inch clearance each side.
- In other words, the gap between the two posts would be 920mm (36 3/4″).
- I marked the post holes accordingly and dug the holes.
The post holes.
- I dug the post holes to a depth of 600mm (24″). The ground was firm.
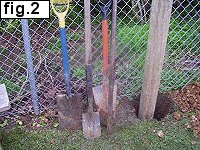
- I have a favorite set of digging tools that I always use when digging holes. See fig.2.
My digging arsenal consists of:
1. One standard spade with a 200mm (8″) straight edge blade.
2. One spade with a blade that tapers down to 100mm (4″) wide. I keep this spade razor sharp and use it mainly for cutting through tree roots.
3. One spade that I cut-to-shape myself out of a larger shovel. It has a 125mm (5″) hooked blade and I use it to scoop all the loose stuff out of the holes.
4. Last but not least, a big steel bar 38mm (1 1/2′) thick, 1800mm (6ft) long and with a chisel point. I use it to break up the ground in the hole.
The concrete
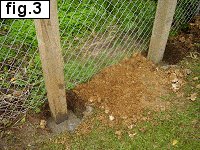
- I mixed a batch of concrete in a wheelbarrow and half filled the holes. I checked that the posts were in the right position then I filled up the holes and rechecked the posts for plumb.
- I made the concrete mix stiff enough so that the posts would stay in an upright position without needing any props.
- For information on how to mix concrete click here.
The header
- The next day when the concrete had hardened I trimmed the top of the posts to the correct height ready for the header.
- The purpose of a header is to hold the posts parallel so that they cannot move inwards and cause the gate to jam.
- I made the header out of 100mm x 100mm (4×4) stock.
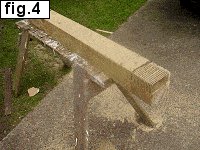
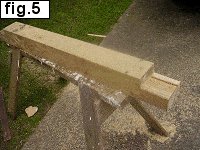
- I first cut it to the correct length (overall measurement from the outside of one post to the outside of the other) and made a rebate 100mm (4″) in from each end of the header and 50mm (2″) deep.
- I did this by making multiple saw cuts across the rebate area and then finishing off with a sharp chisel. See fig.4and fig.5.
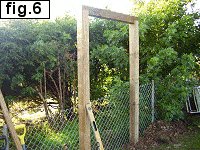
- I then nailed the header to the top of the posts (fig.6).
Making the gate
- I cut two rails to a length 20mm (3/4″) less than the gap between the two gate posts.
For example:
The distance between the two gate posts was 920mm (36 3/4″) so I cut the rails 900mm (36″) long.
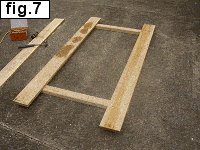
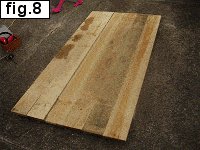
- I then placed the two rails on the ground – spaced apart as shown in fig.7 – and lay two gate boards on top of them, one each side.
- Next I positioned the rails so that the top rail was 150mm (6″) down from the top of the gate boards and the bottom rail was 225mm (9″) up from the bottom of the two gate boards.
- I ensured that everything was square and then I nailed the two gate boards to the rails.
- I used two 60mm (2 1/2″) flat-head galvanized nails at each meeting.
- Next the intermediate boards were put in place and nailed home.
- The final (middle) board had to be ripped down a little to make it fit.
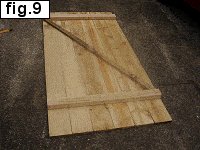
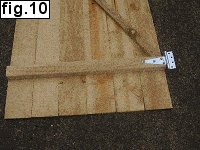
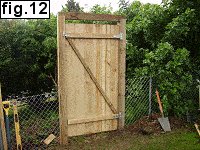
- The gate was then turned over and the brace was marked, cut and fixed in place.
- While the gate was on the ground I also screwed the hinges to the rails.
- I used 75mm x 50mm (2×3) stock for the rails and 50mm x 25mm (1×2) for the brace simply because that was spare wood I happened to have lying around.
- However, you could use other size stock such as 100mm x 50mm (2×4) or even 100mm x 25mm (1×4) for the rails and brace.
Fitting the gate
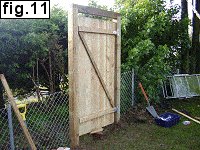
- When the gate was made I positioned it in place between the two gate posts.
- I packed blocks of wood underneath the gate to hold it at the correct height, then I packed each side of the gate with wedges so that the gaps each side of the gate were even.
- The gate was in effect jammed in position and wouldn’t move while I screwed the hinges to the post and fixed the gate latch.
- I then took out the packers and wedges and opened the gate. It worked…of course!
The gate stop
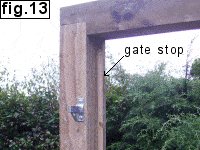
- Finally, I nailed a 1800mm (6ft) long gate stop vertically to the post in such a position that the gate could shut but go no further.
- The gate stop is a strip of 25mm x 25mm (1×1) wood nailed vertically to the post to stop the gate from going further than intended. It will also help to avoid any damage to the latch or hinges should the gate be blown or slammed shut with excessive force for any reason.
- The gate stop also helps to prevent the gate from warping.
Done! Eazy with a “Z”



When making the gate, do you nail the boards to the brace for greater rigidity?
Thanks.