Contents
Introduction and plans
This step stool is a very practical, multi-purpose unit which would find a place in just about any house. It serves as a set of steps, a seat and a stand, all in one.
The step stool stands 400mm (16″) high, 400mm (16″) wide and 235mm (9 1/4″) deep when the step is turned in. It is constructed out of 250mm x 25mm (1″ x 10″) and 100mm x 25mm (1″ x 4″) boards.
About the wood dimensions. All dimensions are given in both Metric (mm) and Imperial (inches). The size (width and thickness) of the wood referred to throughout this project is the ‘actual size’ or ‘true size’, that is, the size of the lumber when it has been finished/planed. Before the lumber has been finished/planed it is called the ‘nominal size’. For example: 250mm x 25mm (1″ x 10″) when planed may become 235mm x 19mm (3/4″x 9 1/4″) actual size.
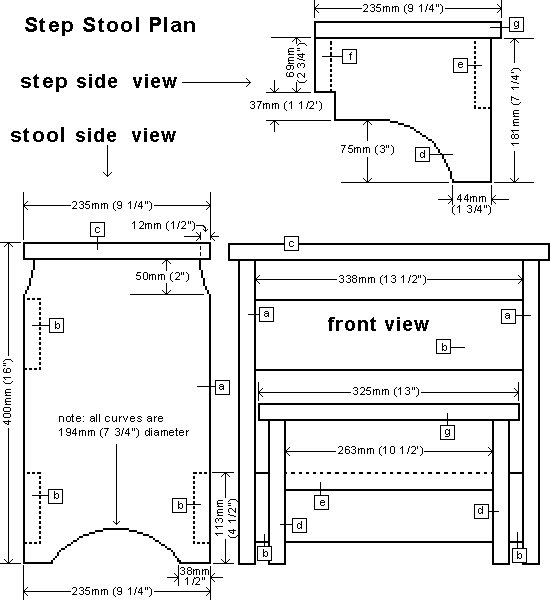
Below are the plan drawings.
Under the drawings is a cutting list with descriptions of all the pieces.
The instructions, with pictures included, are on successive pages.
Below is a cutting list and description of all the pieces of wood.
| PART ID | DESCRIPTION | USA (inches) | USA (inches) | Australasia (mm) | Australasia (mm) | PIECES |
| [a] | Stool sides | |||||
| [b] | Stool rails | |||||
| [c] | Stool top | |||||
| [d] | Step sides | |||||
| [e] | Step front rail | |||||
| [f] | Step rear rail | |||||
| [g] | Step tread |
You will also need a bit of wood glue and about thirty-eight 50mm (2″) long wood screws and a couple of hinges.
Marking, cutting and drilling
Step 1. Cut the pieces
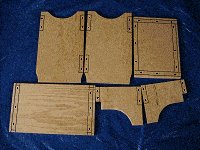
- Cut all the pieces out of 235mm x 19mm (3/4″ x 9 1/4″) and 90mm x 19mm (3/4″ x 3 1/2″) board.
- Refer to the cutting list (page 1) on the previous page for the lengths.
- Once cut to length, the side pieces [a] and [d] then need to be shaped as shown in the plan (page 1) on the previous page.
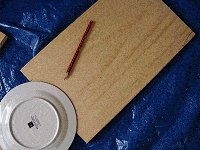
- You can use a bread plate with a diameter of about 194mm (7 3/4′) to mark the curves.
- The curves can then be cut with a jig-saw.
Step 2. Mark and drill the screw hole
- Mark the positions of the rails on the side pieces and also mark the positions of the side pieces on the underside of the stool top [c] and tread [g].
- Refer to the plan) on the previous page for placement and dimensions.
- Then drill all the screw holes within the marked areas as shown in the picture.
- Make the hole diameters slightly bigger than the screw shanks.
Step 3. Fix the stool sides to the front rail
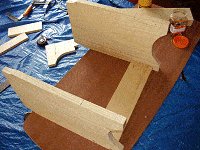
- Glue each end of the front rail [b] and lay it on a flat surface.
- Position the two stool side pieces [a] either side of the rail.
- Screw the two stool side pieces to the rail.
Making the stool and step
Step 4. Fix the stool sides to the rear rails
- Turn the unit over.
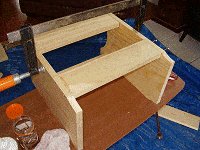
- Smear a bit of glue on both ends of the rear rails and position them in place between the two stool side pieces.
- Hold the unit in place with a clamp.
- Then screw the side pieces to the rails.
Step 5. Screw on the stool top
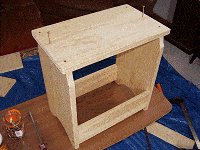
- Glue the top of the stool side pieces [a].
- Position the stool top [c] on top of the two stool side pieces [a] and fix with screws.
Step 6. Make the step frame
- Smear a bit of glue on the ends of both step rails [e] and [f].
- Position the step front rail [e] and the step rear rail [f] in-between the two step side pieces [d] and hold in place with a clamp.
- Then screw the side pieces to the rails.
Step 7. Screw on the tread
- Glue the top of the step side pieces [d].
- Position the tread [g] against the top of the two side pieces [d] and secure with screws.
Attaching the step
Step 8. Fit the hinges
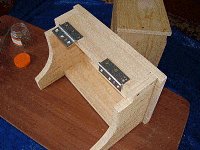
- Screw one half of a pair of 75mm (3″) butt hinges to the bottom of the step rear rail [f].
- Position the hinges about 32mm (1 1/4″) in from each end.
Step 9. Fix the step to the stool
- Sit the step rail [f] on top of the front stool rail [b].
- Ensure that the step unit is positioned exactly in the center between the stool side pieces [a].
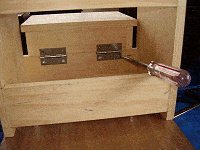
- Screw the loose ends of the hinges to the front stool rail [b].
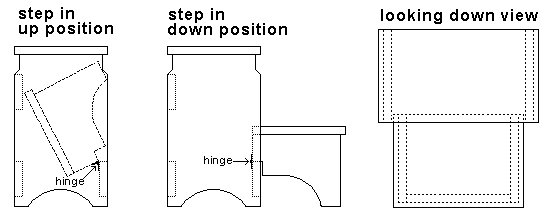
- The step unit will now be able to pivot on the hinges and fold up into the stool unit.
Step 10. Fill the screw holes
- Cover the screw heads if you prefer.
- Here are four options.
- Leave the screw heads exposed.
- Put caps over the screw heads (as shown in the picture). Plastic caps to fit just about any type of screw head can be purchased.
- Countersink the screw in a bit and fill up the hole with a suitable wood filler.
- Bury the screw further into the wood and plug the hole with a purpose-made plug or a piece of dowel (round wood).
Done! Eazy with a “Z”
Safety concerns
Safety first
This step stool is not recommended for younger children.
Please be mindful that a degree of balance and a common sense approach to foot placement is required for safe use of the step stool, this is something that a younger child may not possess or understand.
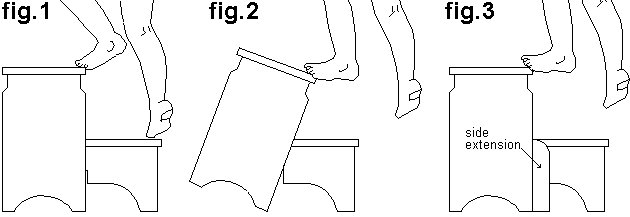
In the fig’s below is one example of how a child (or anyone for that matter) could have a mishap while climbing the step stool. Also shown is how a side extension piece may help minimize such a mishap.
fig.1
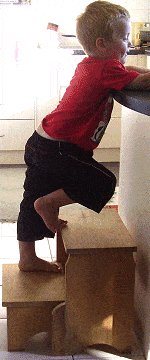
A young child climbs up the step stool placing his/her foot near the front of the top step.
fig.2
The young child continues to climb with his/her foot near the front of the top step.
A slight pushing away movement causes the step stool to tilt over and the child to fall off the stool.
fig.3
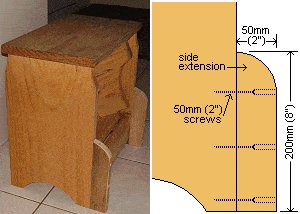
A side extension piece may help minimize a possible ‘fold-back’ mishap.
Even with the side extension, the same rule still applies -“ the step stool is not recommended for younger children” – although the extension will add a bit more stability.
The side extension
- Adding at least a 50mm (2″) wide extension to the sides of the step stool will add more stability.
Note 1: The wider the extension, the less chance of a fold-back mishap.
Note 2: The photo on the right is to show how a child is likely to place his/her foot near the front of the top step rather than in the middle, setting up for a possible mishap as the climbing continues.
The side extension piece may help minimize the chance of a ‘fold-back’ mishap.

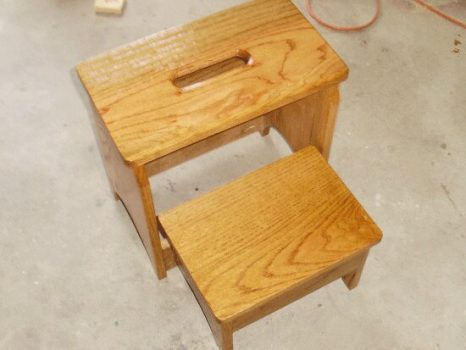
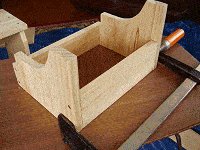
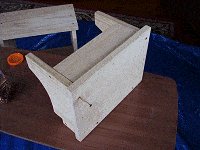
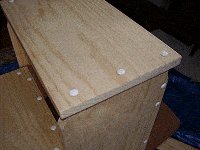
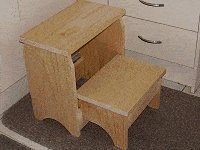
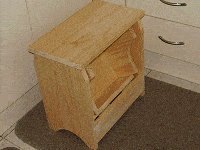


I built your step stool plan yesterday, (see pic). I believe your Item (d) should be 3/4″ X 8- 3/4 X 7- 1/4″ long to allow for about 1/2″ overhang on first step tread. Nice plan though, my wife has been wanting one for a while now.
Thanks Jim Green Phenix City, Alabama
Folding step stool – Our grandchildren need a step up to get to the sink in the bathroom. When the plastic stool we had broke, I looked for some plans and found the folding step stool and made 3 of them, 1 for each of our daughters and 1 for us.
But a problem soon arose. When the 2 year old stepped from the first step to the second, putting her foot near the front of the top step, the step stool folded up and collapsed, leaving her on the floor in a heap. No damage done, but I would not recommend the folding stool for a young person.
Bob Palmateer Bolton, Ontario, Canada.
My granddaughter loves to wash dishes. I’m sure she’ll be over that phase by time she’s 4 or 5 years old. For now though she needed something to help her reach the sink. This stool was the perfect choice.. I was able to complete it in one day and then just waited for the paint to dry. My wife asked if I could make another for our niece’s son and before I knew it I needed to make 3 more for friends and family. My grandson has also found another use for the stool as a small desk.
Kelly Edwards, Howell, NJ
Nice little step stool that is easy to build. BUT the total board length on the 9-1/4 material is 74″. In the US, we can get 72″ or 96″ standard. So if the step top is reduced to 11 inches and the E and F rails reduced to 9-1/2 inches, the 72″ standard is enough. Yes, it would make a slightly smaller step but since it is just the step, I plan to adjust on my next build. (First build was made from pieces I had…next will require new material.)